![biarri-networks-logo.png]](https://fondhelp.biarrinetworks.com/hs-fs/hubfs/biarri-networks-logo.png?height=40&name=biarri-networks-logo.png)
This quickstart takes you through the whole Fiber Planner workflow once, from an empty project to a fiber plan with a bill of materials (BOM), cost estimates and a financial report. You don’t need your own data: FOND’s Area Select feature provides address and street data for anywhere in the US and Canada. If you are outside of North America, you can load in your own datasets.
Each step links to a more detailed article for when you’re ready to go further.
Before you start
- You need a FOND account in a workspace with a Fiber Planner subscription, and a platform seat assigned to you. See Sign up for FOND.
- For your first plan, pick a small area, such as a neighborhood of a few hundred homes. Small areas generate faster, and they make the plan easier to read while you learn.
Step 1: Create a project
A project holds everything for a single network plan: the input data you provide and the network FOND generates from it.
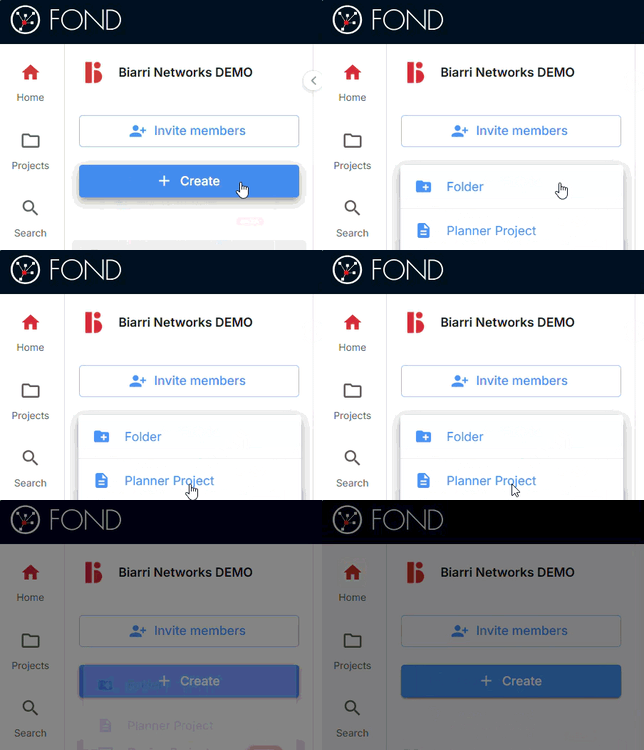
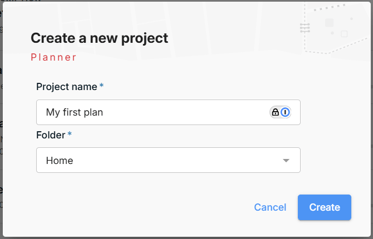
On the home page, click Create, choose Fiber Planner Project, and give the project a name you’ll recognize later, such as the town or service area. At this point you may want to select a folder to place the project in.
 |
|
Step 2: Choose an architecture
An architecture is the set of rules FOND follows when it plans your network, such as cable sizes, split ratios, and how many tiers the network has.
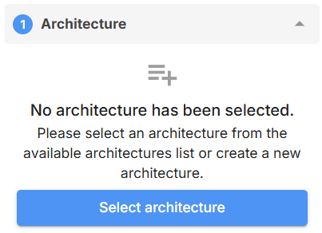
Click Select architecture, then pick one of the architectures already in your workspace and apply it to the project. You can create your own later.
More information: How to configure an architecture · Architecture examples
Step 3: Add input data with Area Select
FOND needs two things to plan a network: the addresses to serve, and the paths where cable can be laid. Area Select gives you both in one step.
- Click Addresses, then Area Select.
- Draw a polygon around your area on the map.
- Select the address and street data to import, then confirm.
Tip: Area Select data is a fast starting point, but it isn’t perfect. Before you rely on a plan for a real business case, check the address data and clean it up as needed.
More information: Sourcing data with Area Select · How to upload data (if you have your own data)
Step 4: Generate the plan
Click Generate design. For a small area, FOND usually takes around 3-10 minutes. You can leave the project open or come back to it later.
When generation finishes, the map shows your planned network on top of your input data.
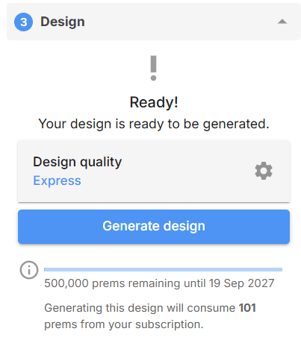
If generation fails, the error message tells you what went wrong. See Common design failures to fix it.
More information: How to generate a design
Step 5: Review the plan
Take a few minutes to explore what FOND has created:
- Inspect the network on the map. Use the legend to switch tiers on and off, and click any hub or cable to see its details.
- Check the BOM to see the materials and costs for the plan.
- Explore Cost to Serve to see how the cost of connecting each address varies across your area.
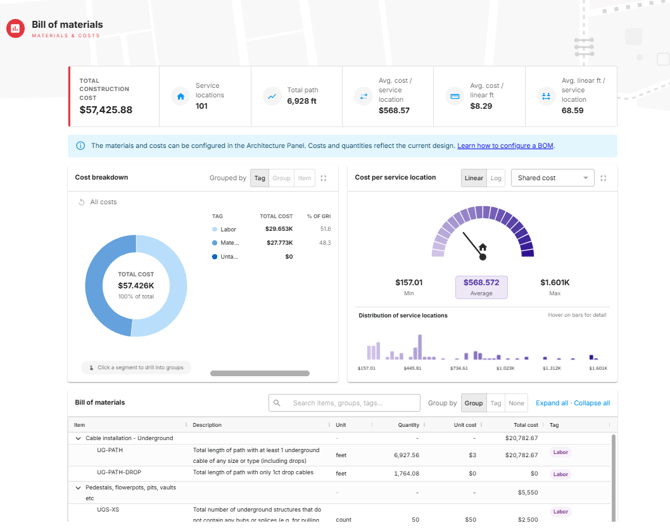
More information: Inspecting the design · What is Cost to Serve?
Step 6: Create a financial report
A financial report turns your plan into a business case, with projected revenue, costs and profitability over time.
From the Report step, click Configure Report. A report needs a configured BOM and a completed Demand Model, so set those up first if you haven’t already.
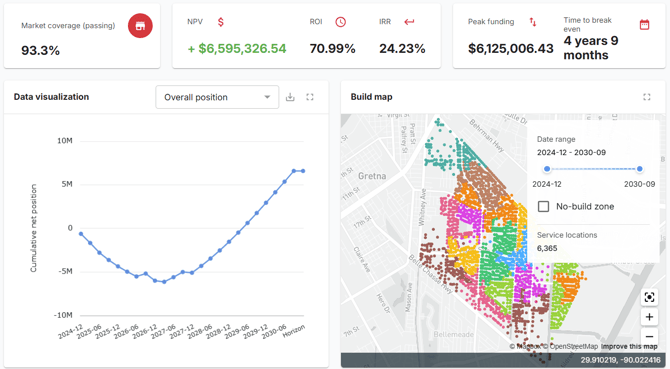
More information: Generating your first report · Minimum report requirements
Step 7: Share and export
Your plan is ready to share and use outside of FOND:
- Share the project with a colleague or customer so they can review it on the map and leave comments.
- Export the plan and BOM to open them in your GIS tool or add them to your feasibility study.