To prepare for data upload
If you need to source or generate data, please review these articles:
- How to use Area Select to source data (see guide)
- How to use the FOND drawing tools (see the guide on underground editing and Pole and Aerial Span editing)
As a second preliminary step, before you get to uploading data, please make sure you know how to create a new project and choose an architecture.
As a third preliminary step, please ensure your data is in the correct format. We have a few restrictions on data types you can upload, for the time being.
Uploading data
To get started, go to the left hand floating panel and, open the dropdown of the Input data layer that you’d like to upload.
As you can see above, once you upload your first layer, FOND will zoom to the section on the map to show you your data. Before proceeding any further, it's always a good idea to visually inspect each layer and make sure it's the data that you intended to upload.
In the GIF above, we select files by clicking the box and opening the file explorer, but you can also drag the files into the box as well. Just remember that for Shapefiles, you need to drag in (or select) the .shp, .dbf and .prj all at once.
If you're using Windows 10, a common occurrence is that the .dbf files are displayed in the folder as 'Open Office' documents. Dragging in these files with the .shp and .prj files will work, even though they aren't labeled correctly.
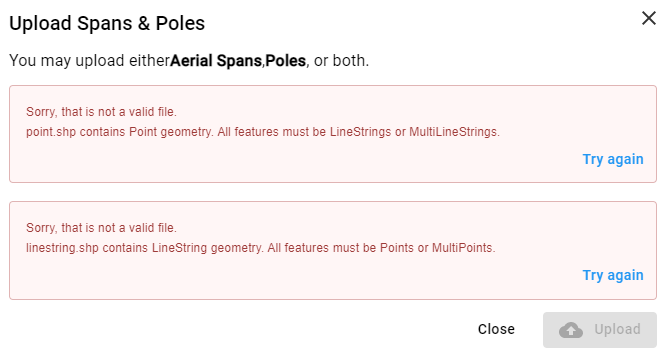
You can follow the above process for each of your Input data layers except for Poles and Aerial Spans which are uploaded together. Please see Uploading Pole and Aerial Spans for more details.
If you see an error like the one below, make sure that the file you’re uploading meets all of the requirements on the page on FOND data restrictions. If you think they do, then send the files over to fondhelp@biarrinetworks.com and let us know what went wrong.
Once you’ve uploaded all your files, check the map to make sure everything is in the right place (see this article on inspecting input data) before clicking “Generate Design”.